
A subject lit from the left will feel wrong in a scene whose strongest light comes from the right.
BACKGROUND REPLACEMENT STUDIO
Put the subject in a scene that actually fits
Replace a plain or distracting background with another image. The convincing part is not the cutout alone—it is matching scale, light, perspective, and contact with the new surface.
Background replacement editorNo image selected
Use a transparent PNG to preview layering immediately.Other images require subject processing.Maximum file size: 10 MB each.
THE REALISM GAP
A perfect cutout can still look pasted on
People notice a fake composite before they can explain what is wrong. Often the edge is acceptable; the mismatch is elsewhere.
A product photographed from above should not sit on a surface viewed from a low angle.
The horizon, furniture, and nearby objects tell the viewer how large the subject should be.
Without a believable shadow or overlap, the subject appears to float above the floor or table.
SCENE STUDIES
Four replacements, four different problems
These examples are not interchangeable. Hair needs edge control; glass needs believable reflections; fur needs fine separation; furniture needs perspective and floor contact.

PORTRAIT
Match the face to the room light
The window is the strongest light source, so the subject must carry a compatible highlight direction. Hair should keep fine strands without a pale outline from the old background.
- Inspect
- Hair, shoulders, color temperature
PRODUCT CAMPAIGN
Reflections belong to the environment
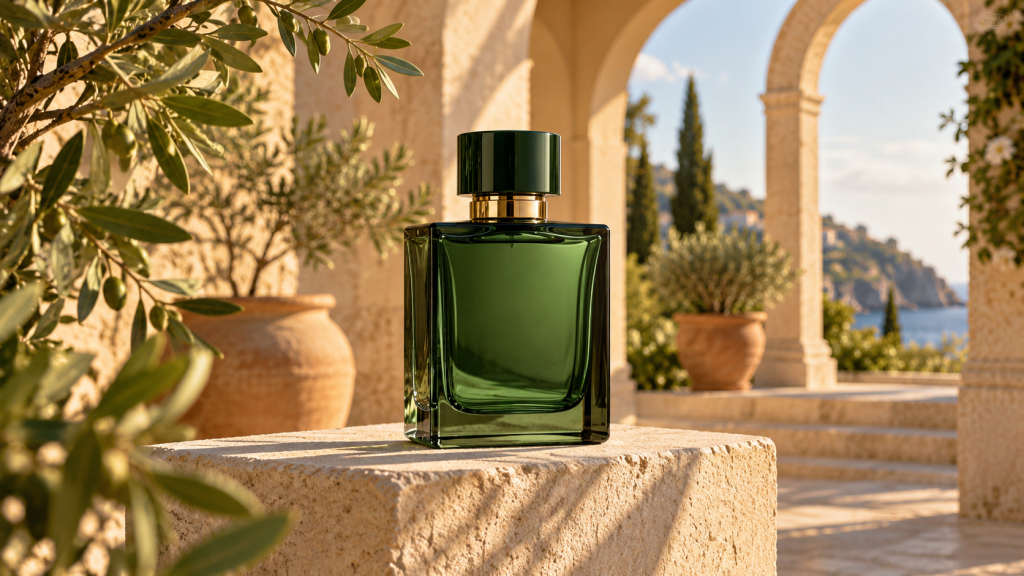
Glass and polished packaging reflect their surroundings. A clean edge is not enough if the bottle still contains colors from the original studio.
- Inspect
- Glass edges, highlights, surface shadow

PET & FUR
Keep texture without carrying the old scene
Fur needs a soft transition. Cutting too tightly creates a plastic outline; keeping too much carries a colored halo into the beach.
- Inspect
- Ears, chest fur, paws on sand
INTERIOR MOCKUP
The floor line decides whether it feels real
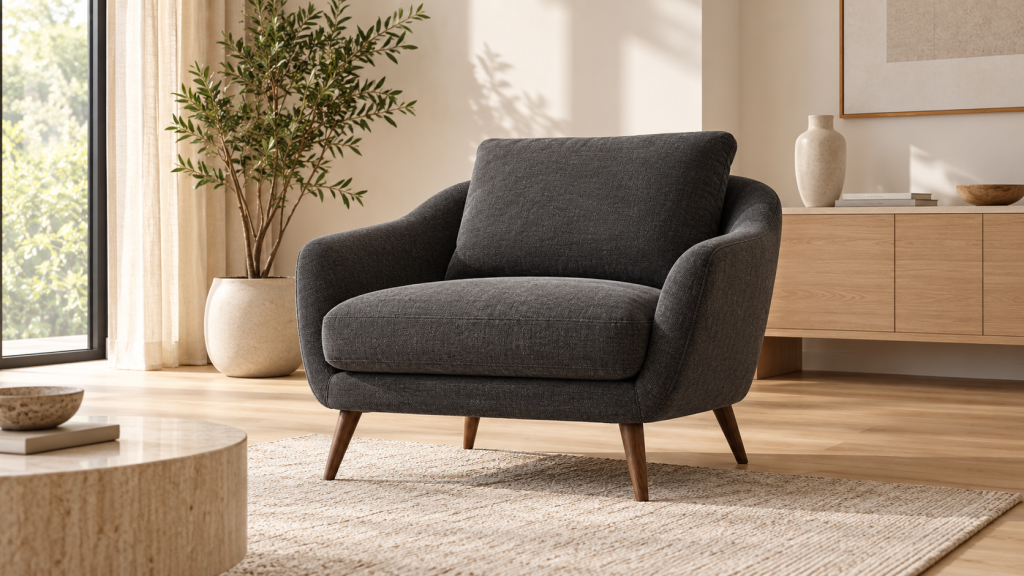
The chair legs must meet the floor plane at a believable angle. Scale them against nearby furniture and rebuild a soft shadow in the same light direction.
- Inspect
- Leg contact, scale, floor perspective
CHOOSE THE SCENE FIRST
The destination narrows the right background
A new background should help the image perform its job. Select a scene type for the practical constraints that matter most.
Use a restrained scene or a solid surface. The product must remain immediately readable at thumbnail size, and every image in the category should follow the same crop and scale.
- Avoid props that resemble items included with the product.
- Keep enough empty area for responsive cropping.
Choose a background with depth and light direction compatible with the face. A heavily blurred scene can hide small inconsistencies, but excessive blur looks artificial.
- Keep the horizon away from the eyes and mouth.
- Match warm and cool lighting before adjusting saturation.
Leave deliberate negative space for copy, buttons, or platform overlays. Check both portrait and square crops before committing to the scene.
- Do not place important detail at the outer edges.
- Test legibility at phone size.
Perspective is the main constraint. A chair, lamp, or table photographed at the wrong camera height cannot sit naturally in the new room.
- Compare vertical lines and vanishing direction.
- Use floor texture to judge contact and scale.
LIGHT MATCH CHECK
Read the subject before choosing the scene
Direction
Find the brightest side of the face or object. The new scene should explain that light.
Softness
Hard sunlight creates crisp shadows. An overcast room creates broad, soft transitions.
Temperature
Warm sunset light and cool office light should not be mixed without color correction.
Intensity
A bright subject placed in a dark room needs adjustment or it will glow unnaturally.
Fast diagnostic
Squint at the composition or reduce it to a small thumbnail. If the subject still jumps out as a separate layer, compare brightness and shadow direction before editing the edge again.
FILE PREPARATION
Two source files need enough detail
A sharp subject on a tiny background—or a large background behind a compressed screenshot—will not produce a balanced result. Start with files close to the final output dimensions.
- Use the original subject photo rather than a screenshot.
- Choose a landscape background for wide banners and a portrait scene for vertical posts.
- Avoid enlarging a small background to fill a high-resolution canvas.
- For transparent subject layers, PNG or WebP can preserve empty pixels.
Background replacement without the usual surprises
Can I upload my own background image?
Yes. Choose an image that matches the intended crop and the subject’s camera angle. A visually attractive background can still be unusable if its horizon or light direction conflicts with the subject.
Why does the subject look too large or too small?
Use recognizable objects, the floor line, and the horizon as scale clues. Resize the subject while viewing the whole composition, not only its edges.
Should I keep the original shadow?
Keep it only if it agrees with the new surface and lighting. A studio shadow carried onto grass, sand, or a patterned floor usually reveals the replacement.
Why is there a colored halo around hair or fur?
Those edge pixels still contain color from the old background. They need careful cleanup or decontamination rather than a harder cut.
Are files deleted automatically?
The final storage and deletion policy will be documented after the production processing service is connected and tested. The preview does not claim a deletion schedule yet.
Will the output be suitable for commercial use?
You must have permission to use both the subject and the replacement background. The tool does not grant rights to uploaded images.