BACKGROUND COLOR EDITOR

Give any image a cleaner background color

Upload a product photo, portrait, or transparent PNG. Choose a precise color, compare it on the canvas, and prepare a consistent image for a store, profile, or campaign.

✓ JPG, PNG & WebP✓ Color presets + HEX✓ Preview before processing
Color background editorNo image selected
COLOR DECISIONS, NOT DECORATION

What changes when the background changes?

A useful background color solves a specific problem. It can make a pale product readable, unify a catalog assembled from different photo sessions, or separate a portrait from a distracting room. Picking the prettiest swatch is not enough.

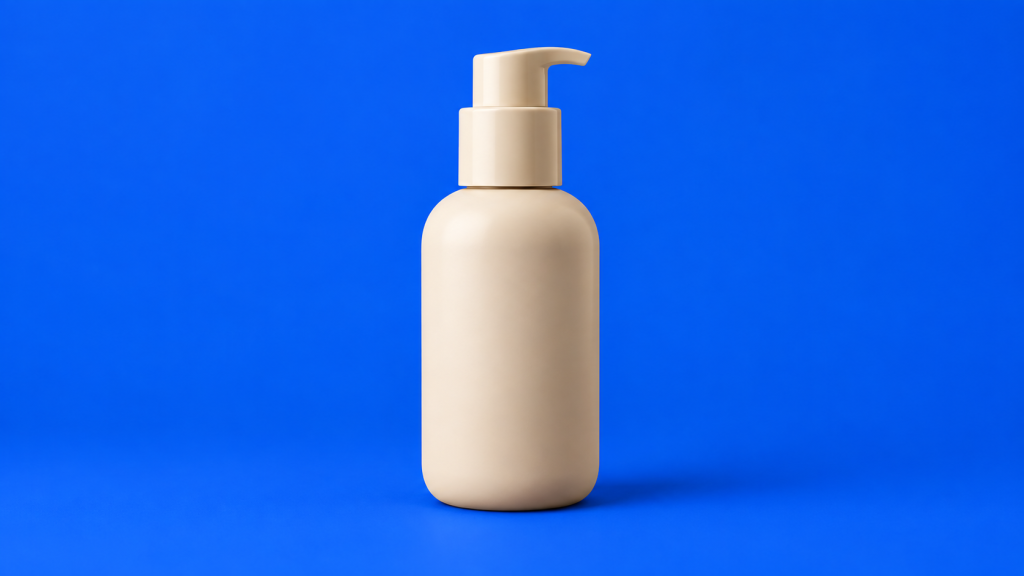
Beige skincare bottle on a cobalt blue background
CONTRAST

Pale product, strong background

The beige bottle would lose definition on white. Cobalt gives its silhouette a clean edge, but the saturated color also makes the image feel promotional rather than neutral.

Best for
Campaign tiles and category covers
Watch
Blue reflections on glossy edges
Portrait on a terracotta background
SKIN & CLOTHING

Warm does not mean orange

Terracotta works because the cream shirt creates separation. If clothing and background share the same value, shoulders begin to disappear even when the colors look different.

Best for
Profiles, speakers and team pages
Watch
Warm color spill around hair
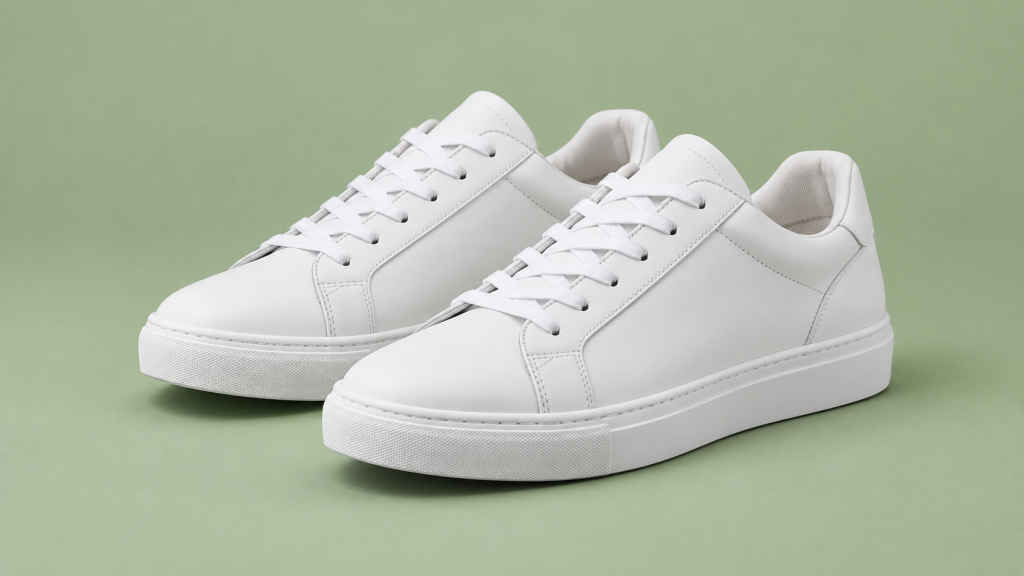
White sneakers on a muted sage background
SOFT NEUTRAL

White needs a visible boundary

Muted sage keeps the shoes bright without the harsh cutout effect of pure black. It also leaves enough calm space for a price or short caption in a later design.

Best for
Lifestyle shops and social assets
Watch
Gray shadows turning green
The quick test:

Temporarily view the image in grayscale. If the subject still blends into the background, changing hue alone will not fix it. You need a lighter or darker value.

READY-MADE COLOR RECIPES

Start with the destination, then choose the color

These are starting points, not universal rules. Copy the HEX value into the editor, test it against the actual subject, and inspect the result on the same type of screen or page where it will appear.

Do not sample from a screenshot.Compression and display settings can shift the shade. Use the value from the original brand guide.

Marketplace product

Pure white keeps the listing neutral and usually matches marketplace grids.

Handmade or natural product

A warm off-white softens ceramics, wood, leather, and natural fabrics.

Calm portrait

Muted sage adds color without competing heavily with skin and clothing.

Premium dark presentation

Deep navy can suit pale or metallic subjects when their edges are clean.

Campaign or thumbnail

A vivid violet creates impact; reserve it for assets meant to attract attention.

THE WORKFLOW

Three decisions. No crowded editor.

The page keeps the job narrow: pick the image, settle on a color, then inspect the edges before downloading.

  1. 01

    Choose the strongest source

    Use the largest original available. A clear subject and visible edges give the processing stage more information to work with.

  2. 02

    Set the background color

    Start with a preset or enter a HEX value supplied by your designer. This is safer than trying to match a shade by eye across several images.

  3. 03

    Inspect, then export

    Zoom around hair, straps, glass, and thin product parts. These are the first areas to reveal a rough cutout.

COLOR WITHOUT GUESSWORK

Pick the shade for the destination

White and off-white

Useful for marketplaces, menus, documents, and any layout where the product itself must carry the attention.

Check whether the platform requires pure white #FFFFFF.

Soft neutral colors

Beige, pale gray, and muted green give lifestyle products a calmer presentation while keeping text overlays readable.

Watch the contrast around light clothing and packaging.

Strong campaign colors

Blue, violet, coral, or another brand shade can make a group of assets recognizable at a glance.

Use the exact HEX value rather than a close-looking substitute.

Dark backgrounds

Deep charcoal and navy suit reflective objects and premium portraits, but weak edges become easier to notice.

Look closely for pale halos around the subject.
BEFORE YOU UPLOAD

A better source file saves repair work

A tool can separate a subject more cleanly when the original contains real detail. Screenshots, images copied from messaging apps, and files that have been compressed repeatedly often create soft or blocky edges.

  • Choose the original camera or export file when possible.
  • Avoid a subject wearing the same color as the existing background.
  • Keep the full object inside the frame; cropped handles and shoes cannot be restored.
  • For transparent output, PNG is the practical download format.
WHERE IT HELPS

One tool, several practical outputs

01

Store catalogs

Keep category pages consistent when product photos arrive from several suppliers.

02

Profile images

Replace a busy room with a clean color suited to a team directory or speaker page.

03

Social batches

Prepare several assets around the same campaign palette without rebuilding each layout.

04

Print material

Set a controlled background before placing the image into a flyer, menu, or presentation.

COMMON QUESTIONS

Details worth checking before download

These answers cover the decisions that usually affect the final file, not just the upload step.

Can I enter an exact brand color?

Yes. Enter a six-digit HEX value such as #2457FF. If a brand guide provides RGB values, convert them carefully and keep the same HEX value for every image in the set.

Why does a pale outline appear around the subject?

The outline often comes from pixels that still contain the old background color. Hair, fur, glossy packaging, and motion blur need the closest inspection.

Which format should I download?

Use PNG when you need transparency. JPG is suitable for a finished image with a solid background and can produce a smaller file. WebP is useful online when your publishing system supports it.

Will changing the color improve a low-resolution photo?

No. A new background does not restore missing detail. Start with the largest clean source you have and avoid enlarging a small image before processing.

Are uploaded images stored?

The final retention policy will match the processing provider connected before launch. This page does not promise automatic deletion until that workflow has been verified and documented.

READY TO TEST A COLOR?

Start with one clean image.

Open the color editor ↑